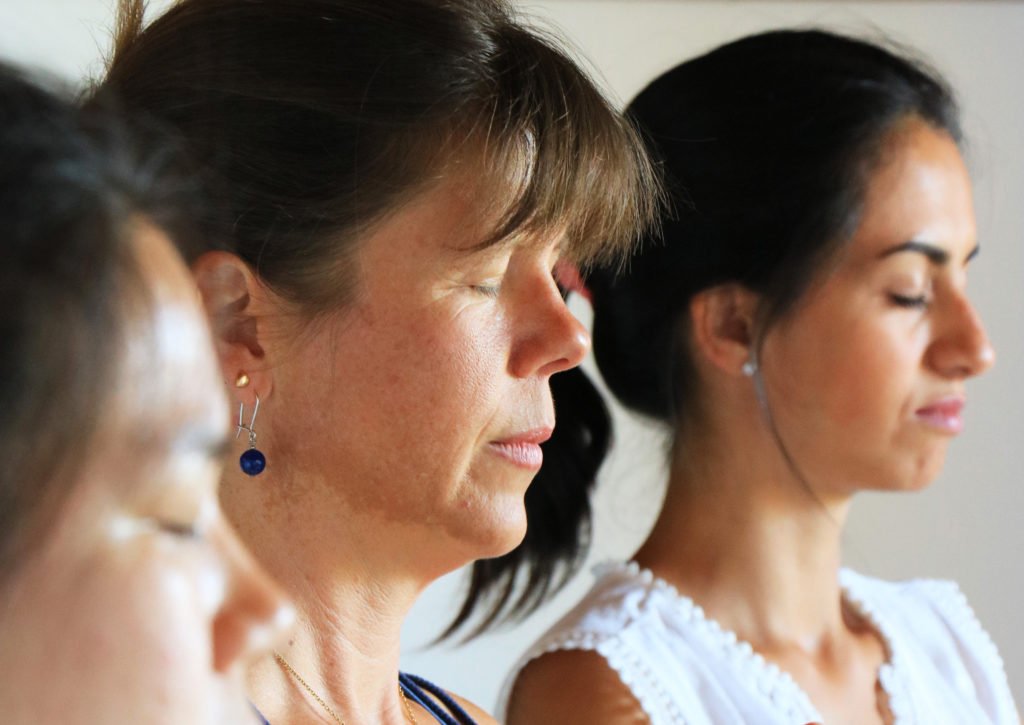
Photo by AnitaKovacs.photographie@gmail.com
My friend, a PhD in psychology, is making a proposal for a clinical study with the elderly. She asked me what difficulties I observe with people learning and practicing mindfulness?
That’s an easy one. There are two big categories and one counter indication to watch out for. The two big categories are beliefs and behavioral change. The counter indication is unaddressed mental-emotional issues.
Beliefs
What’s the difficulty with beliefs? The main issue here is that there are a lot of miss-understandings that surround mindfulness. This is largely because of the difficulty of describing a state of being to someone who had never experienced it. The listener is required to interpret the meaning from their current experiences, which are inadequate for the situation. Add to this that some of the explanations derive from venerable traditions that are thousands of years old and you get both a bifurcation of meaning due to the time lapse, and a strong desire of listener to believe the wisdom even if they know they don’t completely understand it. Voila, lots of myths crop up and spread.
The most pernicious myth is that mindfulness is about clearing your mind of thoughts. That you’re doing “good practice” if you’ve stopped thinking. So many people suffer from this one, agonizing that they couldn’t practice at all today, that they couldn’t get their mind to stop thinking… Or worse that they can’t meditate. The good news here is that your mind won’t ever stop thinking. Like your heart, it will keep beating to it’s own drum until you don’t need it anymore. And this is a good thing. You don’t need to stop thinking in order to meditate or be mindful.
Another popular one is that to be present, you should not think about the past or the future. That being present, in the here and now, excludes and thoughts of past and future. This is simply not true. Being present means being aware of whatever is happening in the present, including that you’re here and now having thoughts about the past and future. This is also a good thing because this means we can be mindfully learning from past mistakes and creating the future.
And, perhaps my all time favorite, due to my own personal knowing about this myth, is that people that are present are very calm and peaceful (and don’t get angry, sad, etc.). Haha. As I like to say, being present doesn’t make me less of an a**hole, it just makes me more aware of when I’m being an a**hole. It’s not particularly fun. It does offer me a lot more flexibility in how I react in that state, which is an enormous boon.
All of these mythic misunderstandings can be dispelled with a basic experiential example that demonstrates your experience of presence right now (everyone can and does) as well as some basic understanding of how presence isn’t about denying thoughts or feelings, it’s about being aware that we’re thinking and feeling them in this moment.
Though, perhaps “dispelled” is too strong of a word. Addressed might be better. In my years of guiding people through this re-education, it takes a while for the new information to sink in and replace the older beliefs. I think that this is in part because often people come to meditation because they want relief from their thoughts and feelings. They so desperately want to stop being harassed by the difficulties in their heads and hearts, that the idea that meditation will take all of it away is incredibly appealing. The reality that it works in a much different way, that all of that nasty stuff will persist, is simply uninspiring. It’s bad enough that they have to practice for the rest of their lives, but that the magic off-button doesn’t exist is terrible news!
And why should they believe that? Everyone, including me, is telling them that their minds will be calm and clear. And they will. Just not by clearing their minds of thoughts, not by stopping thinking and feeling. It’s being present to those things that creates the calmness and the clarity. Understanding that difference is a bit challenging at first. Then as they start experiencing that, things get easier. The old beliefs can change as the new experience brings new information. Some people stop before they have experienced presence enough to understand the difference. This is one of the main reasons why beginners stop practicing… They don’t get the experiential understanding before they give up. They think that because they can’t stop their minds that they can’t meditate. This is unfortunate and more a matter of education and the willingness of the person to let go of what they thought were the reasons that brought them to the practice in the first place… This takes courage and a bit of resilience.
Behavioral Change
The next big category of difficulty for beginning mindfulness practitioners is creating the habit of daily practice. Like creating any new habit, it takes dedication and effort. It also requires experimentation and creativity as habit creation is a science and an art… everyone has a unique relationship to inspirations and challenges, carrots and sticks.
- First, why practice daily? Because meditation is a kind of personal hygiene, like brushing your teeth, and it’s best done daily. Short periods of time are sufficient as regularity is more important than duration. In other words, 5 minutes a day is more useful than 1 hour once a week. Again, think brushing your teeth. It’s mental floss.
- Next, it helps to understand that habit change means altering existing patterns to introduce new ones. It helps to recognize the usefulness of the existing patterns, and to find the open spaces within them, the breathing room, where we can alter them slightly to fit in this new one. That few minutes after brushing our teeth is a great place. Or just before bed. Or right when we wake up.
- Another useful concept to come to terms with is consistency. Understanding what it is and what it isn’t… understanding that regularity doesn’t mean every day like clockwork, that you’re not a machine, that you’re not failing if you miss a day here and there, and how to flow with the irregularities of life.
Understanding that regularity does mean being as consistent as possible which includes incorporating things that encourage and support it like journaling, having visual or auditory reminders (post-it notes, alarms, apps, calendar reminders, etc), or adopting concepts like James Clear’s “never miss more than 1 day” and other things that work for you, etc.
It helps to know that everyone is different! No matter what a scientific study says about the group of people they studied, you are a unique individual and you will need to think and feel through this for yourself. Use the tools available and see what works best for you. This is part of the challenge and the fun.
Counter Indications
Ah the counter indication. I’ve read some really hairy articles about this. People having flash backs, intense anxiety attacks or going into severe depression – all attributed to practicing mindfulness or some other form of meditation. Mindfulness is like a mirror. If you hold it up, you will start to see things.

Photo by AnitaKovacs.photographie@gmail.com
The issue here is that most of us humans have some things in our lives that we’re in denial about. Things that we think or feel that we dislike so much that we actively or unconsciously ignore. Maybe we have an anger problem that we cover up by trying to be nice all of the time. Or we’re really sad about the direction of our lives, but we keep soldiering on because that’s what we’re supposed to do.
Then we start practicing mindfulness. And what mindfulness is designed to do is to help us see ourselves. A common response of my clients is something like, “I didn’t realize that I thought so much! And that so many of my thoughts are negative!” I remember one client who said, “I had no idea how mean I am to my daughter! No wonder our relationship is so bad. I thought it was just her!” Knowledge is power. Self-knowledge is super power.
But what if what you start to see and feel are things that you don’t want to be aware of? What if you simply aren’t ready or willing to face your shadows? What if you don’t want to know how sad, mean, angry, etc you are? This, of course is another BIG reason why people stop practicing. They are happier not knowing. They’re more comfortable in their denial. And I encourage these people to stop. This is not easy work. If you don’t want to see, better to close your eyes again. Really.
And of course, what if you start remembering trauma? Trauma by (my) definition is something that was too overwhelming for you to deal with all at once. In this case, you stored parts of the experience for processing later. Maybe you needed to deal with all of the paperwork before you could grieve the death of your parent. And what if you never gave yourself the time later? It’s possible that while practicing mindfulness you will start to feel that grief.
For some people that can be confusing or frightening. For these people, and also people who have debilitating mental-emotional issues, if they want to continue with mindfulness, I recommend the help of a therapist. Otherwise, I suggest that they stop practicing mindfulness, that they stop looking if they don’t want to see.
I’ve only had this issue arise with one client, and she was unstable before she came I realized later. Thanks to her, I am more diligent about watching for signs. For myself, my own repressed childhood traumas didn’t begin re-surfacing until 9 years into my mindfulness practice. I was ready, and I also got lots of help navigating.
Strong reactions are not something I worry about in the sense that I know that mindfulness will only show you what is already here. If you have pain and trauma, then when you start being more aware of yourself, you might become aware of it. Mindfulness does not create it. Like a mirror, it helps you see it.
Can You Do It?
Can you meet the challenges to practicing mindfulness?
Can you let go of your idea that you’ll never think or feel anything bad again, that you’ll never dwell on the past or be afraid of the future? Can you accept that the key is to be more aware of these things and that somehow – in some possibly unexplainable way to you at the moment – that being more conscious of the icky stuff will make it much, much easier to deal with? (And as a big bonus, you’ll get to be more conscious of the wonderful stuff, too!!)
Are you willing to put in the work to create a 5-minute per day practice?
Can you handle the fact that you will be more aware of how nasty and wonderful you are?! Can you commit to getting help (or stopping) if what you’re noticing is more than you can or want to handle on your own?
These are important questions to consider. You are important to consider. Mindfulness doesn’t automatically make you a better person. It does make you a much more informed person, which makes you incredibly powerful. You are more clear about what is going on in your life, inside and out and with this comes the ability to make better decisions.
The client with the daughter? They’re getting along better now.
Eléna started her mindfulness practice in 2004, during her 11 years in Thailand. She has coached mindfulness internationally off and on since 2010, and intensively her last 3 years in Hong Kong to lawyers, bankers, CEO’s and full time mothers. (She’s still not sure who was more stressed.) Contact her for private, online sessions at Elena at ElenaFoucher.com.